Best Practices for Deploying Nodes on AWS
You can deploy a Chainlink node on the AWS Cloud using AWS Quick Start to deploy a highly available and secure Chainlink node on the AWS Cloud.
Created Resources
The Quick Start creates the following public resources:
- An Elastic Load Balancing (ELB) load balancer to access the Chainlink node web graphical user interface
- A Linux bastion host in an Auto Scaling group to allow inbound Secure Shell (SSH) access to EC2 instances in public and private subnetworks
- Managed network address translation (NAT) gateways to allow outbound internet access for the Chainlink node instances in the private subnets
Because these resources are public facing, you should review security and best practices information on a regular basis against vulnerabilities that pose a risk.
IAM Roles
The Quick Start creates the following IAM roles:
- Administration Role: Grants the provided administrator ID with administrator access
- Execution Role: Grants cloudformation.amazonaws.com the administration role to extend the functionality of stacks by enabling create, update, or delete stacks across multiple accounts and regions with a single operation
- Chainlink Node Role:
- Enables instances to use Systems Manager core service functionality
- Enables instances with logs and metrics functionality in CloudWatch
- Enables instances to retrieve Chainlink node secrets created during the Quick Start
Billable Services
The Quick Start has the following billable services. Click on each link to learn about the pricing model for each service:
- Amazon EC2
- Amazon Virtual Private Cloud (VPC)
- Amazon Aurora PostgreSQL-Compatible DB
- Parameter Store
- AWS Secrets Manager
- AWS Key Management Service
- Amazon CloudWatch
- (Optional if you are not using a public certificate with AWS Certificate Manager) Application Load Balancer
- (Optional) Amazon Devops Guru
You are responsible for the cost of the AWS services and any third-party licenses that you use while running this Quick Start. There is no additional cost for using the Quick Start.
AWS maintains service limits for each account to help guarantee the availability of AWS resources. You are responsible for monitoring and managing the service limits of the resources that this Quick Start provisions.
For more information, visit Manage Service Limits.
Best Practices
Do not run as the root user
The operations on the Chainlink node do not require the root user so it is recommended to use the default user or run as a non-root user.
Protect your AWS account
As a best security practice, rotate programmatic system credentials and cryptographic keys.
If you enable Amazon Devops Guru, the Quick Start deploys an AWS managed customer key (CMK) that is used for the Amazon SNS topic for DevOps Guru. The default setting is automatically set to rotate this KMS key every year.
Monitor your Chainlink node's health
Run regular health checks of your Chainlink node.
We recommend using a monitoring solution to track the health of your Chainlink node, such as Prometheus or Grafana. Chainlink exposes metrics on the /metrics endpoint of the UI. By default, that's http://localhost:6688/metrics.
# A scrape configuration containing exactly one endpoint to scrape:
# Here it's Prometheus itself.
scrape_configs:
  # The job name is added as a label `job=<job_name>` to any timeseries scraped from this config.
  - job_name: 'chainlink_node'
    static_configs:
    - targets: ['127.0.0.1:6688']
    metrics_path: '/metrics'
Alternatively, you can run a health check on your node using curl and make sure the checks are passing. You can replace localhost:6688 with the load balancer endpoint if you are using a domain.
curl -XGET localhost:6688/health | jq '.'% Total % Received % Xferd Average Speed Time Time Time Current
Dload Upload Total Spent Left Speed
100 1900 100 1900 0 0 927k 0 --:--:-- --:--:-- --:--:-- 927k
{
"data": [
{
"type": "checks",
"id": "*offchainreporting.SingletonPeerWrapper",
"attributes": {
"name": "*offchainreporting.SingletonPeerWrapper",
"status": "passing",
"output": ""
}
},
{
"type": "checks",
"id": "*job.spawner",
"attributes": {
"name": "*job.spawner",
"status": "passing",
"output": ""
}
},
{
"type": "checks",
"id": "*fluxmonitor.concreteFluxMonitor",
"attributes": {
"name": "*fluxmonitor.concreteFluxMonitor",
"status": "passing",
"output": ""
}
},
⋮
]
}To check the status of your Chainlink node container, use the docker ps command.
Recovering or Upgrading your Chainlink Node Container
Tag versions for Chainlink node releases are available in the Chainlink docker hub
If the Chainlink node containers are stopped or if you need to start up a new instance during an upgrade or recovery, you must create new .env, .password, and .api files to start the Chainlink node.
Generating the .env file
cd /home/ec2-user/.chainlink/ && ./create-env.sh \
${chainNetwork} \
${blockchainNodeUrl} \
${psqlUser} \
$(aws secretsmanager get-secret-value --secret-id DBSecret --query "SecretString" --output text) \
${psqlHostname} \
${psqlPort} \
${psqlDb}
Generating the .password file
cd /home/ec2-user/.chainlink/ && ./create-password.sh \
$(aws secretsmanager get-secret-value --secret-id WalletSecret --query "SecretString" --output text)
Generating the .api file
cd /home/ec2-user/.chainlink/ && ./create-api.sh \
${apiUser} \
$(aws secretsmanager get-secret-value --secret-id ApiSecret --query "SecretString" --output text)
Stopping and removing the existing Chainlink node container
This process is required when you update the container to a newer release.
docker stop chainlink && docker rm chainlinkStarting the Chainlink node container in Docker
latestimage=$(curl -s -S "https://registry.hub.docker.com/v2/repositories/smartcontract/chainlink/tags/" | jq -r '."results"[]["name"]' | head -n 1)
cd /home/ec2-user/.chainlink && docker run -d \
--log-driver=awslogs \
--log-opt awslogs-group=ChainlinkLogs \
--restart unless-stopped \
--name chainlink \
-p 6688:6688 \
-v /home/ec2-user/.chainlink:/chainlink \
--env-file=/home/ec2-user/.chainlink/.env  smartcontract/chainlink:$latestimage local n \
-p /chainlink/.password
-a /chainlink/.api
You can find more details with maintenance and examples in the Performing System Maintenance guide.
Additionally, follow the directions in the User Guide for Linux Instances to keep your Amazon Linux instance software up to date.
Backup and Restore
Database Backup
The PostgreSQL database is critical because it stores most of the Chainlink node data. Aurora automatically backs up your PostgreSQL cluster during the backup window with a default backup retention of 7 days. You can change the database cluster’s backup retention period to be as short as 1 day or up to 35 days. For more details, see the guide for backing up and restoring an Aurora cluster.
If the primary instance in your PostgreSQL cluster fails during an instance or service failure, Aurora will automatically fail over to an existing read replica or create a new primary instance if there are no read replicas available.
EC2 Instance Backup
By default, the Chainlink node does not contain any critical data other than the logs found in the Chainlink directory. If the primary Chainlink node instance is marked as unhealthy during an instance or service failure, the Auto Scaling group schedules a replacement instance and the standby Chainlink node instance will automatically fail over.
You can backup the EBS volumes attached to the Chainlink node by following the instructions in the Amazon EBS snapshots guide. The Amazon Data Lifecycle Manager can help to automate your EBS snapshots. To create a backup of the entire EC2 instance, you must create an AMI from the instance.
To see how to restore resources from an Amazon EBS snapshot or an AMI, see the Restoring from an Amazon EBS snapshot or an AMI guide.
Failover Capabilities and Disaster Recovery
Chainlink node reputation depends on the uptime of the following itmes:
- The Chainlink node
- The database
- The Ethereum client
To reduce downtime, failover capabilities are required on both the Chainlink node and Ethereum clients so that the service is still online even in the unlikely event of a virtual machine or network failure.
The Amazon EC2 Auto Scaling group provisions both a primary Chainlink node and a standby Chainlink node. Each node is placed in a separate Availability Zone.
If one Availability Zone becomes unhealthy or unavailable, the Amazon EC2 Auto Scaling group launches a new instance of the Chainlink node or bastion host in the unaffected Availability Zone. The failover happens automatically.
The data from both the Chainlink node and the Ethereum client is stored in the PostgreSQL database. The Aurora database cluster is fault tolerant by design and can handle an Availability Zone failure without any loss of data. There might be only a brief interruption of service with an automatic failover, which helps to reduce the Recovery Point Objective (RPO) and Recovery Time Objective (RTO).
Management of AWS service limits are not required for proper disaster recovery. The Quick Start deployment is configured with high availability in mind.
Troubleshooting and Design Practices
AWS Certificate Manager
In the AWS console, if the SSL certificate with AWS Certificate Manager is set to false, you can leave arn:aws:acm:region:account-id:certificate as is. However, if your node is external facing and must be reached by the internet, enable this feature and set it to true.

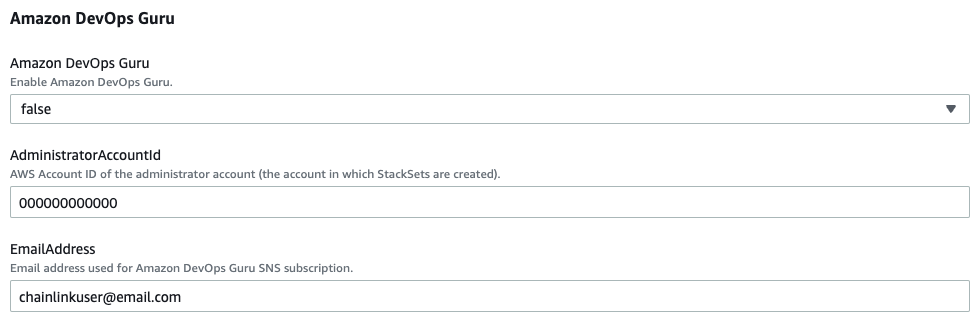
Amazon Devops Guru
In the AWS console, if the Amazon DevOps Guru is set to false, you can leave AdministerAccountId and EmailAddress as is.